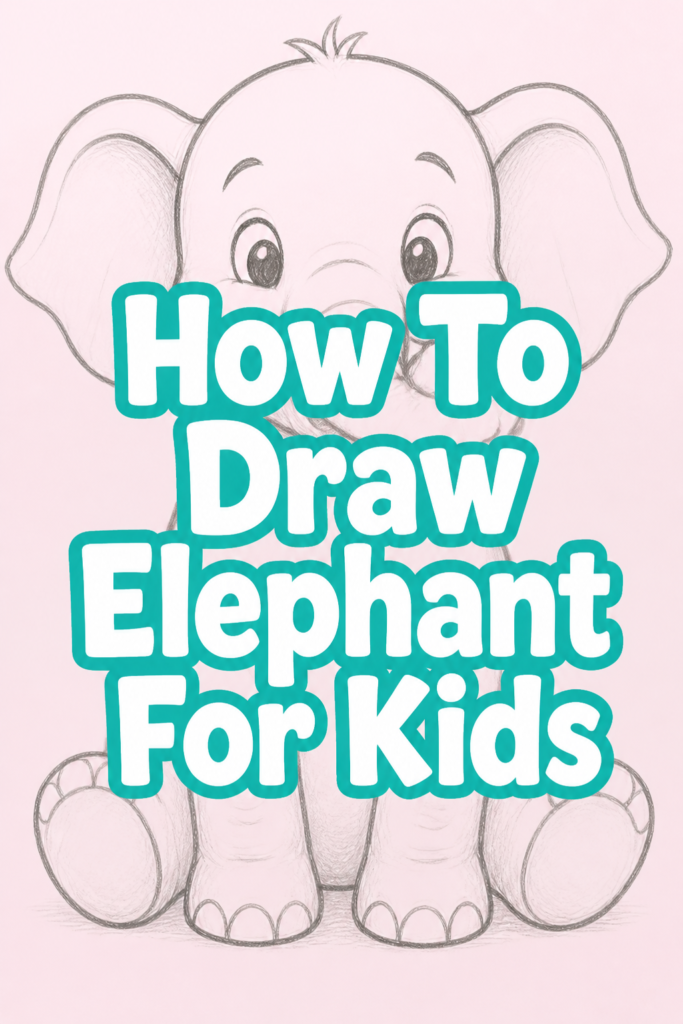
🐘 How To Draw Elephant For Kids
Do you love elephants? I certainly do! These gentle giants are incredible creatures.
I remember drawing my first elephant many years ago, and it was such a fun experience to see it come to life on paper. This guide will show you how to draw your very own elephant friend.
You will learn to draw an elephant, step by easy step, even if you’ve never drawn before.
Quick Overview
This guide will help you create a charming elephant drawing from simple shapes. We’ll build up the different parts of the elephant, making it easy and fun. By the end, you’ll have a lovely elephant ready to color!
- Time needed: 30-45 minutes
- Difficulty: Beginner
- What you’ll need: Pencil, eraser, paper, optional: colored pencils or crayons
Step-by-Step Instructions
Step 1: Start with Basic Shapes for the Body and Head
Draw a large oval shape in the middle of your paper for the elephant’s body. This will be the biggest part. Don’t press too hard with your pencil yet.
Above and slightly to the left of the large oval, draw a smaller circle for the elephant’s head. Make sure it slightly overlaps the large oval.
These two shapes are the foundation of your elephant. They help you get the proportions right from the start.
Pro Tip: Use light, sketchy lines for these first shapes. This makes it much easier to erase later if you need to adjust anything. Think of them as your guide.
Step 2: Connect the Head and Body
Now, let’s connect the head and body. From the bottom of the head circle, draw two curved lines down to meet the top of the body oval. This forms the elephant’s neck.
These lines should be gentle curves, not straight, to show the natural shape of the elephant. Make sure the connection looks smooth.
Step 3: Sketch the Trunk
Elephants are famous for their long trunks! From the front of the head circle, draw two slightly curved lines extending downwards. These lines should start close together at the head.
As they go down, they can gently widen a little, then come together again at the bottom, forming a rounded tip. The trunk should look like a long, flexible tube.
Step 4: Add the Big Ears
Elephants have wonderful, large ears. From the sides of the head, draw two big, floppy ear shapes. They should look like large, rounded leaves or even potato chips.
One ear will be visible on each side of the head. Make them quite large, extending behind and slightly below the head. They can have a gentle curve at the top and bottom.
Step 5: Draw the Sturdy Legs and Feet
Time for the legs! Elephants have thick, strong legs. From the bottom of the large body oval, draw two pairs of lines for the front and back legs.
Each leg should be thick and cylindrical, like a tree trunk. For each leg, draw two parallel lines extending downwards. At the bottom of each leg, draw a wide, flat curve for the foot.
You’ll draw two legs visible on the front side and two slightly behind them, making it look like four legs. The feet should be flat and wide.
Step 6: Add Tusks (Optional)
Some elephants have tusks. If you want to add them, draw two curved shapes coming out from the sides of the trunk, near where it meets the head.
These should be gentle, outward-curving shapes that taper to a point. They add a majestic touch to your elephant. If you prefer a baby elephant, you can skip the tusks.
Step 7: Detail the Face and Tail
Now, let’s give your elephant some personality! Draw two small circles for the eyes on the head, above the trunk. Add a tiny dot in the middle of each for the pupils.
For the trunk, draw a small curve at the very tip to show the nostril opening. You can also add a few small, curved lines on the trunk to suggest wrinkles.
For the tail, draw a thin, curved line from the back of the body. At the end of the tail, draw a small tuft of hair, like a little brush.
Step 8: Refine Lines and Erase Guides
Now that all the parts are in place, it’s time to make your drawing neat. Go over your preferred lines with a slightly firmer hand, making them darker and clearer.
Carefully erase all the initial light guide lines, like the overlapping parts of the head and body ovals. Make sure your elephant’s outline looks smooth and complete.
Step 9: Add Finishing Touches and Color
To make your elephant look even better, you can add some subtle details. Draw a few curved lines on the ears to show their inner shape or folds.
You can also add some texture lines on the legs and body to suggest wrinkles in the skin. Finally, it’s time to color your elephant! Gray is a classic choice, but you can use any color you like.
You can make your elephant blue, pink, or even rainbow-colored. Have fun with it!
Common Mistakes to Avoid
Disproportionate Features
Sometimes, when drawing, one part of the elephant might end up much bigger or smaller than it should be compared to the rest. For instance, tiny ears on a huge body can look a bit strange.
To fix this, always start with those basic shapes. Make sure your head circle and body oval are a good size relative to each other. Then, build the other parts, like ears and legs, in proportion to those main shapes.
Messy or Overlapping Lines
It’s easy to get carried away and draw too many lines, or not erase the guide lines properly. This can make your final drawing look confusing and untidy.
Remember to use light, sketchy lines at first. Only darken the lines you want to keep. Take your time to carefully erase all the extra pencil marks after you’ve finalized your elephant’s shape.
Forgetting the Trunk’s Flexibility
A trunk isn’t a straight, stiff pole; it’s very flexible! Sometimes, kids draw the trunk too straight or too narrow, making it look unnatural.
When drawing the trunk, make sure to add a gentle curve or two. Think about how an elephant might use its trunk to reach for something. The tip should also have that small opening for the nostrils.
Troubleshooting
My Elephant Looks Lopsided
If your elephant seems to lean to one side or looks unbalanced, it often comes from not having a clear center line or drawing the initial shapes unevenly.
Go back to your initial body oval and head circle. Make sure they are placed centrally on your paper and are roughly symmetrical. Adjust the placement of the legs to ensure they are evenly spaced and support the body.
The Trunk Doesn’t Look Right
A common issue is making the trunk too thin, too short, or not flexible enough. It might look more like a horn than a trunk.
Try redrawing the trunk using two gently curving lines that start together at the head, widen slightly in the middle, and then taper to a rounded tip. Imagine it as a soft, bendable tube, not a rigid stick.
The Ears Are Too Small or Too Big
Getting the ears just right can be tricky because elephants have such unique ears. If they look out of place, it might be due to their size compared to the head.
Remember, elephant ears are very large and rounded. They often extend behind the head and can reach down to the neck area. If yours are too small, make them bigger and floppier. If they’re too big, try reducing them slightly until they look balanced with the head.
Key Takeaways
- Always start with simple shapes like ovals and circles to build your elephant.
- Use light pencil lines initially for easy erasing and adjustments.
- Pay attention to proportion when drawing features like ears and the trunk.
- Practice drawing curved lines for the trunk, legs, and body to show flexibility.
- Don’t be afraid to erase and redraw parts until you are happy with them.
- Adding details like wrinkles and a tail tuft makes your elephant unique.
Frequently Asked Questions
Can I draw a baby elephant instead of a grown-up one?
Absolutely! To draw a baby elephant, you would make the head and body shapes a bit rounder and closer in size. Baby elephants also have shorter trunks and often don’t have tusks. Just make everything a little cuter and chubbier!
What colors should I use for my elephant?
Traditional elephant colors are various shades of gray, from light to dark. However, you can use any colors you like! Some people enjoy drawing elephants in fantastical colors like blue, purple, or even rainbow. It’s your drawing, so be creative!
What if I make a mistake while drawing?
That’s perfectly fine! Making mistakes is part of learning and drawing. That’s why we use pencils and erasers. Don’t be discouraged. Just gently erase the part you don’t like and try again. Each attempt helps you improve.
How can I make my elephant look more realistic?
To add realism, focus on details like skin texture. You can draw many small, curved lines on the body, legs, and trunk to suggest wrinkles. Also, think about shading. Adding shadows under the belly and legs can make your elephant look more three-dimensional.
Our Top Recommended Finds
- Sketch Pad: A good quality pad with plain paper gives you plenty of space to practice and create. It’s perfect for all your drawing adventures.
- Pencil Set with Eraser: A set with different pencil hardnesses (like 2B for sketching and 4B for darker lines) and a reliable eraser is essential for any artist.
- Colored Pencils or Crayons: Once your elephant is drawn, you’ll want to bring it to life with color. A basic set of colored pencils or crayons is ideal for adding that final touch.
Your Creative Journey Begins Now!
You’ve just learned how to draw an amazing elephant! This is just the beginning of your creative journey. Every drawing you make helps you get better.
Don’t stop here! Why not try drawing other animals, like a playful monkey or a roaring lion? You can use the same approach of starting with simple shapes.
Grab your pencil and paper and keep exploring the wonderful world of drawing today. You have all the tools you need to create something fantastic.