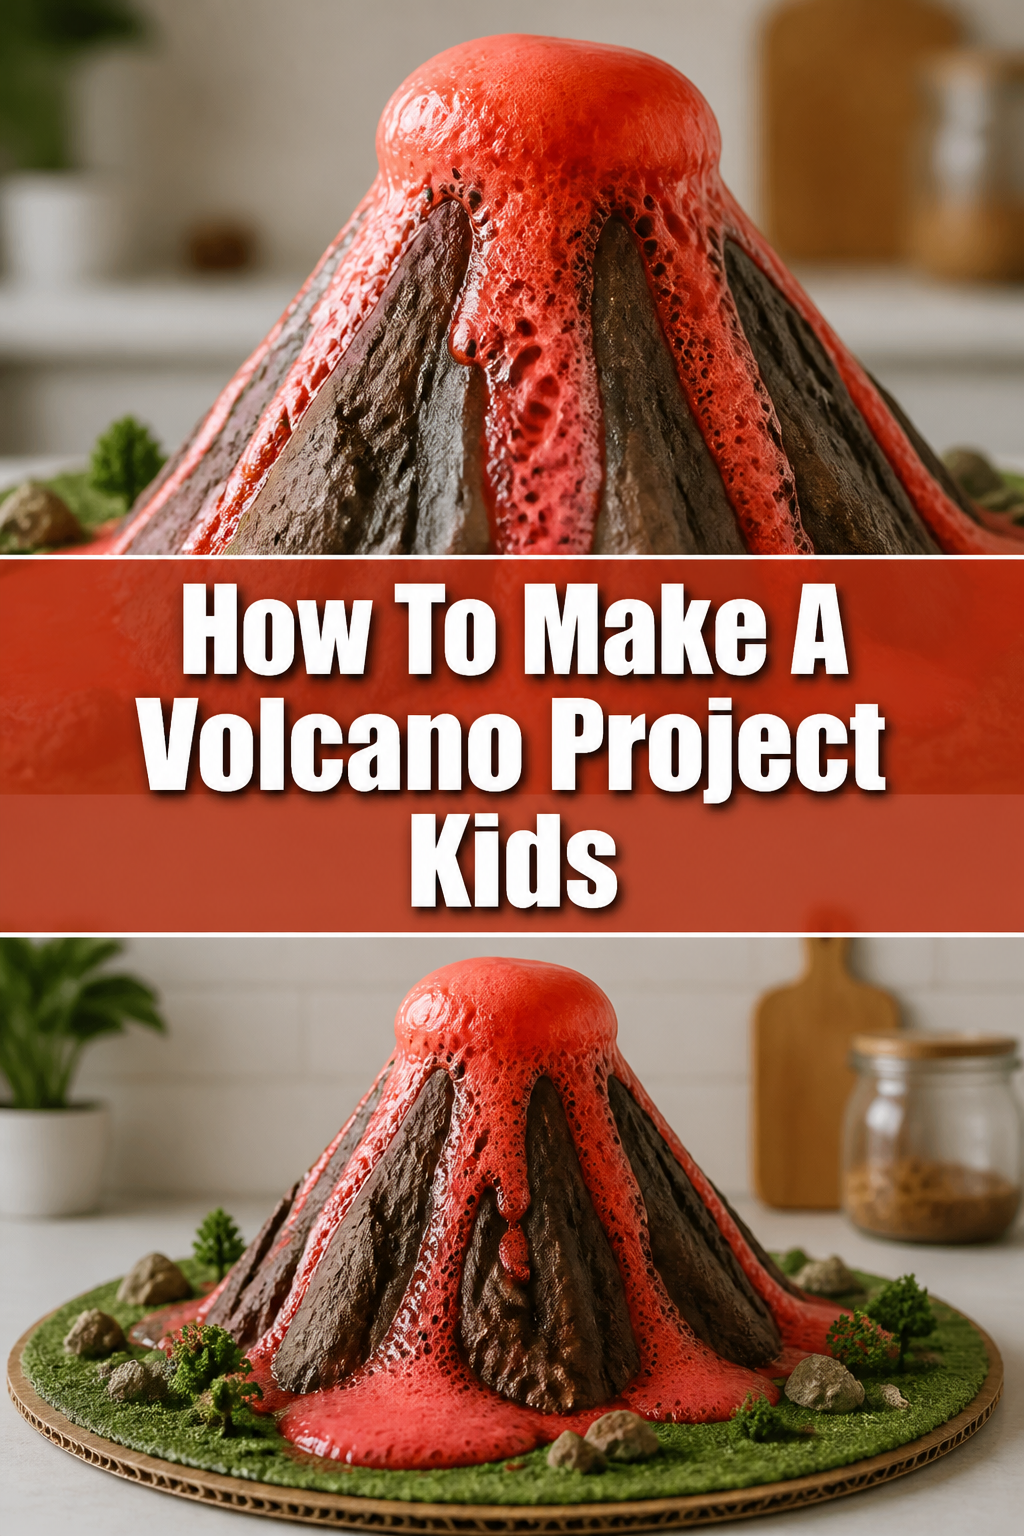
🌋 How To Make A Volcano Project Kids
I remember the absolute thrill of making my first volcano project as a kid. The anticipation, the mess, and that incredible fizzing eruption made it an unforgettable experience. This guide will help you create that same magic, ensuring a fun and successful project for any young scientist.
We’ve built countless volcanoes over the years, refining techniques to make it easy, engaging, and spectacularly eruptive every time. You’re in capable hands for this exciting journey into geology!

Quick Overview
This project is a fantastic way to combine art, science, and hands-on learning. You’ll construct a realistic volcano model and then trigger a thrilling chemical eruption. It’s perfect for school projects, science fairs, or just a fun afternoon at home.
- Time needed: 2-4 hours (including drying time, which is the longest part)
- Difficulty: Beginner
- What you’ll need: Cardboard base, plastic bottle, newspaper, masking tape, flour, salt, water, paint, baking soda, vinegar, dish soap, red/orange food coloring.
Step-by-Step Instructions
Step 1: Gather Your Materials
Collect all the necessary items before you begin construction. Having everything ready prevents interruptions and makes the process smoother. A clear workspace is also helpful.

Lay out a protective cover, like old newspapers or a plastic tablecloth, on your work surface. This project can get a little messy, especially during the paper mache and painting stages.
Step 2: Prepare the Base and Bottle
Cut a sturdy piece of cardboard to serve as your volcano’s base. A square or round shape, about 12-18 inches across, works well. This base provides stability and a foundation for your mountain.
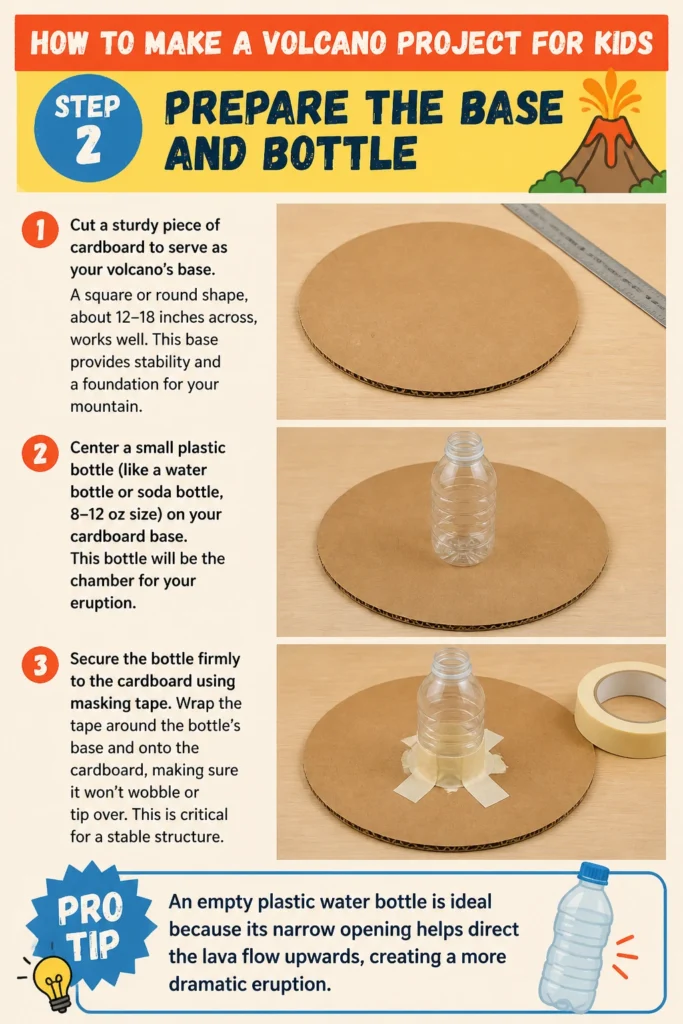
Center a small plastic bottle (like a water bottle or soda bottle, 8-12 oz size) on your cardboard base. This bottle will be the chamber for your eruption.
Secure the bottle firmly to the cardboard using masking tape. Wrap the tape around the bottle’s base and onto the cardboard, making sure it won’t wobble or tip over. This is critical for a stable structure.
Pro Tip: An empty plastic water bottle is ideal because its narrow opening helps direct the “lava” flow upwards, creating a more dramatic eruption.
Step 3: Build the Mountain Structure
Crumple sheets of newspaper into various sized balls and shapes. These will form the basic shape of your volcano mountain around the bottle.

Begin attaching the crumpled newspaper around the secured bottle using masking tape. Build up the sides of the volcano, gradually sloping downwards from the bottle’s neck to the cardboard base.
Continue layering and taping newspaper until you achieve a conical volcano shape. Don’t worry about perfection; natural volcanoes are imperfect. Ensure the bottle’s opening remains clear and accessible at the top.
Step 4: Mix the Paper Mache Paste
Combine two parts flour with one part water in a large mixing bowl. For example, two cups of flour to one cup of water.
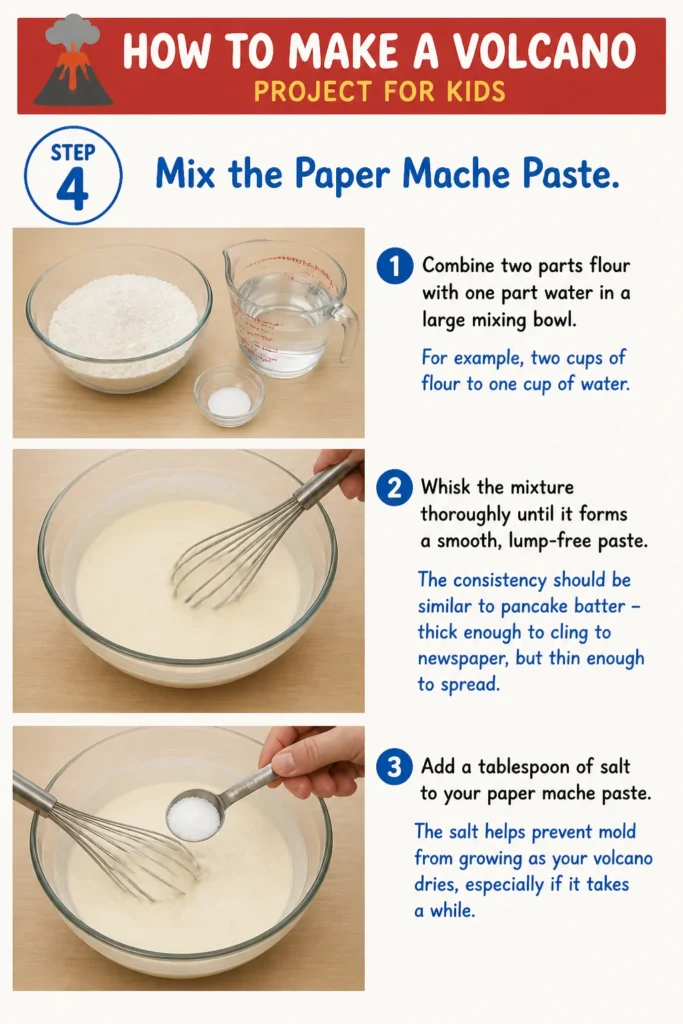
Whisk the mixture thoroughly until it forms a smooth, lump-free paste. The consistency should be similar to pancake batter – thick enough to cling to newspaper, but thin enough to spread.
Add a tablespoon of salt to your paper mache paste. The salt helps prevent mold from growing as your volcano dries, especially if it takes a while.
Step 5: Apply the Paper Mache Layers
Tear newspaper into strips about 1-2 inches wide and 6-8 inches long. Smaller pieces are easier to work with on curved surfaces.

Dip each newspaper strip into the paper mache paste, making sure it’s fully coated. Gently pull off any excess paste by running the strip between your fingers.
Lay the paste-covered strips over your newspaper mountain structure. Overlap each strip slightly to create a strong, continuous surface.
Cover the entire volcano structure with at least two or three layers of paper mache. This builds strength and creates a smooth surface for painting. Ensure the bottle opening is not covered.
Pro Tip: Apply some extra paper mache around the base where the volcano meets the cardboard. This helps create a seamless transition and adds stability.
Step 6: Allow Your Volcano to Dry Completely
Place your paper mache volcano in a well-ventilated area to dry. This is the most crucial step for a durable model.
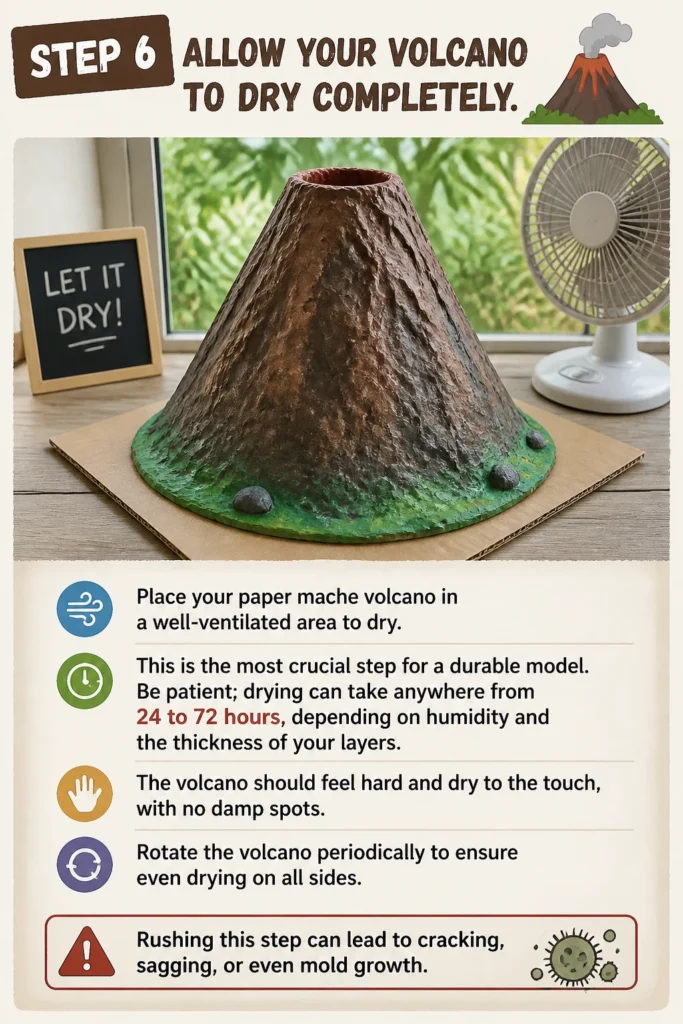
Be patient; drying can take anywhere from 24 to 72 hours, depending on humidity and the thickness of your layers. The volcano should feel hard and dry to the touch, with no damp spots.
Rotate the volcano periodically to ensure even drying on all sides. Rushing this step can lead to cracking, sagging, or even mold growth.
Step 7: Paint and Decorate Your Volcano
Choose appropriate colors for your volcano. Dark browns, grays, and black for the rock are typical. You might add hints of red or orange near the crater for a fiery effect.

Apply acrylic craft paints with brushes. Start with the base colors and then add details. You can create texture by dabbing paint with a sponge.
Consider adding small details like green felt for trees or tiny toy animals to create a realistic landscape around the base. This adds character to your model.
Allow the paint to dry fully before proceeding to the eruption stage. This prevents smudges and ensures a neat final appearance.
Step 8: Prepare for the Eruption
Place your dry and painted volcano in an easy-to-clean area, preferably outdoors or in a sink/tub. Eruptions can be messy and exciting!
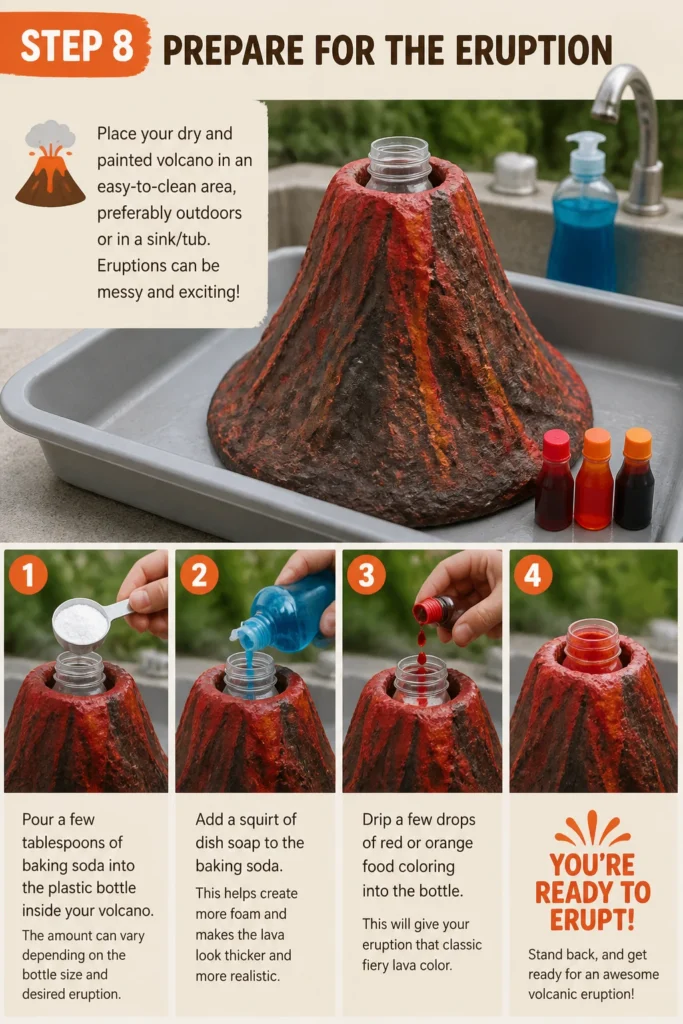
Pour a few tablespoons of baking soda into the plastic bottle inside your volcano. The amount can vary depending on the bottle size and desired eruption.
Add a squirt of dish soap to the baking soda. This helps create more foam and makes the “lava” look thicker and more realistic.
Drip a few drops of red or orange food coloring into the bottle. This will give your eruption that classic fiery lava color.
Step 9: Make It Erupt!
Pour about half a cup to a full cup of vinegar into the bottle. Watch the magic happen immediately!
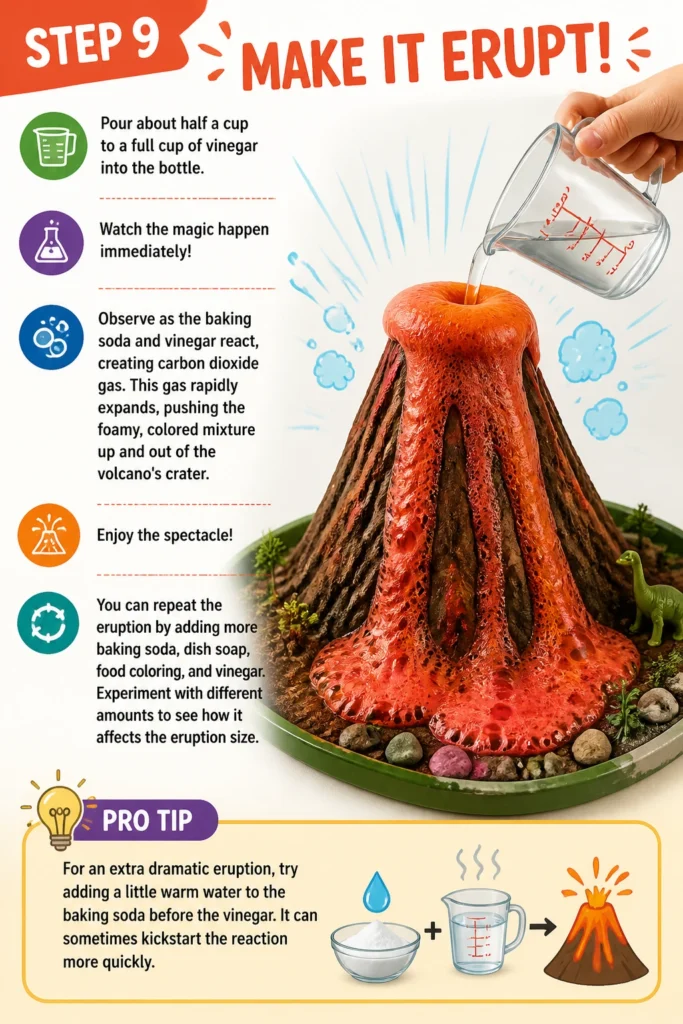
Observe as the baking soda and vinegar react, creating carbon dioxide gas. This gas rapidly expands, pushing the foamy, colored mixture up and out of the volcano’s crater.
Enjoy the spectacle! You can repeat the eruption by adding more baking soda, dish soap, food coloring, and vinegar. Experiment with different amounts to see how it affects the eruption size.
Pro Tip: For an extra dramatic eruption, try adding a little warm water to the baking soda before the vinegar. It can sometimes kickstart the reaction more quickly.
Common Mistakes to Avoid
Too Much Water in Paper Mache Paste
Using a paste that is too watery will make your newspaper strips soggy and difficult to work with. It also significantly increases drying time and can weaken the overall structure of your volcano. Aim for a consistency like thick pancake batter. If it’s too thin, simply stir in a bit more flour until it thickens.
Not Securing the Bottle Firmly
If the plastic bottle inside your volcano isn’t taped securely to the base, it can wobble or even tip over during construction or, worse, during the eruption. This creates a messy situation and can damage your project. Take extra time to tape the bottle down firmly from multiple angles.
Rushing the Drying Time
Impatience during the drying phase is a common pitfall. If you paint or try to erupt your volcano before the paper mache is completely dry, you risk cracks appearing in the paint, mold growing underneath, or the structure collapsing. Always allow at least 24-72 hours in a well-ventilated area.
Improper Eruption Ratios
Getting the baking soda and vinegar proportions wrong can lead to a weak fizz or an overwhelming overflow. Too little of either ingredient will result in a disappointing eruption. Start with the suggested amounts (2-3 tablespoons baking soda, 1/2-1 cup vinegar) and adjust incrementally to find the perfect balance for your bottle size.
Troubleshooting
Volcano Won’t Erupt
If your volcano produces only a weak fizz or no eruption at all, the most common culprit is incorrect ingredient ratios or expired ingredients. First, ensure your baking soda and vinegar are fresh; old products lose their potency. Next, try adding more baking soda to the bottle, followed by a generous pour of vinegar. Make sure there’s enough room in the bottle for the reaction to build pressure and erupt.
Cracks Appear in the Surface
Cracks in your volcano’s surface, especially after drying or painting, usually indicate that the paper mache wasn’t fully dry before further steps, or the layers weren’t thick enough. To fix this, you can apply a few more strips of paper mache over the cracks, let them dry completely, and then repaint the affected areas. Ensure future projects have ample drying time.
Leaking at the Base During Eruption
If your “lava” is leaking from the base of the volcano instead of erupting from the top, it suggests a gap or weak point in your paper mache layers around the bottle. This can also happen if the bottle wasn’t sealed properly to the cardboard base. To prevent this, ensure your paper mache layers completely cover and seal the area where the bottle meets the cardboard. For existing leaks, you can try applying a thick layer of craft glue or even hot glue around the base of the bottle inside the volcano, letting it dry before the next eruption.
Key Takeaways
- Planning and gathering all materials beforehand makes the project much smoother.
- Securing the internal bottle firmly is essential for a stable and safe volcano.
- Patience during the paper mache drying phase is crucial to prevent cracks and mold.
- Experiment with baking soda and vinegar amounts to achieve the perfect eruption.
- Get creative with painting and decorating to make your volcano unique and realistic.
- Always conduct eruptions in an easy-to-clean area to manage any exciting messes.
Frequently Asked Questions
Can I use different materials for the mountain structure?
Absolutely! While newspaper and paper mache are popular and cost-effective, you can also use modeling clay, air-dry clay, or even rigid foam for the mountain. Each material offers a different texture and construction experience, but ensure it can be securely attached to your base and around the bottle.
How can I make the eruption bigger and more foamy?
To achieve a more dramatic and foamy eruption, increase the amounts of baking soda and vinegar. Adding a generous squirt of dish soap is key for creating abundant, long-lasting foam. You can also try adding a little warm water to the baking soda before the vinegar; sometimes, this can boost the initial reaction.
Is the volcano project reusable for multiple eruptions?
Yes, your volcano model is definitely reusable! After an eruption, simply rinse out the plastic bottle inside your volcano with water to clean it. Once dry, you can add fresh baking soda, dish soap, food coloring, and vinegar to create another exciting eruption. The painted exterior should remain intact.
What if I don’t have newspaper for the paper mache?
No problem! You can substitute newspaper with other absorbent papers like paper towels, scrap printer paper, or even brown packing paper. Just tear them into strips as you would with newspaper. The key is to use paper that can absorb the paste and form a sturdy, layered shell.
Our Top Recommended Finds
- Kids’ Craft Paint Set: A vibrant set with various colors allows for creative and realistic volcano decoration. Look for washable acrylic paints for easy cleanup.
- Plastic Drop Cloths: Essential for protecting your work surfaces from paint and eruption spills. They are inexpensive and can be reused for many projects.
- Large Mixing Bowl with Spatula: Having a dedicated bowl and mixing tool for your paper mache paste makes preparation easier and keeps your kitchen utensils clean.
Ignite Your Scientific Curiosity!
Building a volcano project is more than just a craft; it’s an immersive science experiment that sparks curiosity and teaches fundamental chemical reactions. Imagine the look of awe as your creation dramatically erupts, simulating the raw power of nature! This hands-on experience is incredibly rewarding and leaves a lasting impression.
So, why wait? Gather your supplies, clear your workspace, and embark on this thrilling adventure today. You’re not just making a model; you’re creating a memorable learning experience. Who knows, this might just be the first step in discovering a future geologist or chemist!