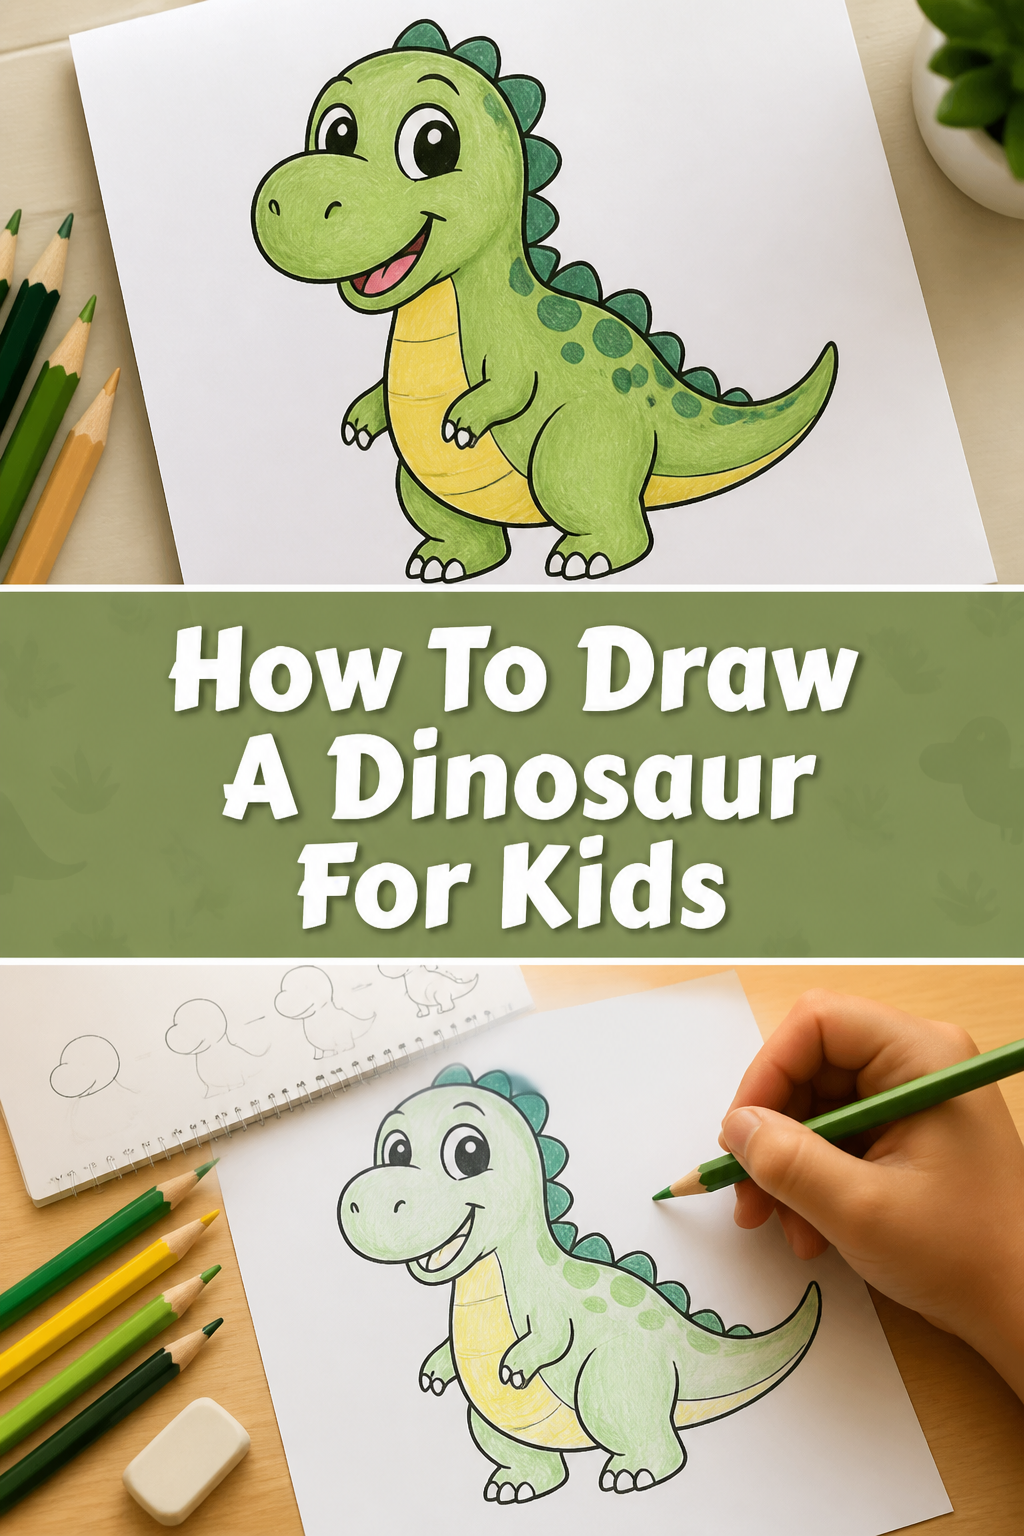
🦖 How To Draw A Dinosaur For Kids
Learning to draw a dinosaur can be an amazing adventure. It brings these ancient giants to life right on your page.
I’ve spent countless hours doodling these magnificent creatures with my own kids, seeing their excitement grow with each line. This guide makes it easy for anyone to create their very own dinosaur masterpiece.
Get ready to unleash your inner artist and bring a fantastic prehistoric friend to life.
Quick Overview
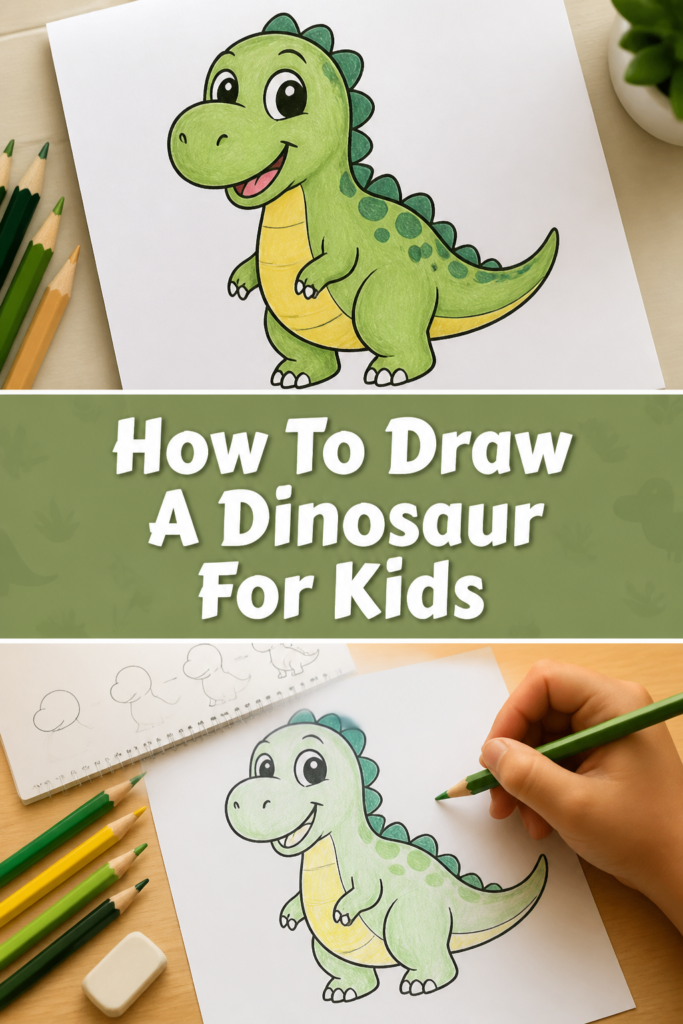
This guide will walk you through drawing a complete dinosaur, from simple shapes to adding all the fun details. You will learn easy techniques to create a fantastic creature you can be proud of.
- Time needed: 30-45 minutes
- Difficulty: Beginner
- What you’ll need: Paper, pencil, eraser, crayons or colored pencils
Step-by-Step Instructions
Step 1: Sketch the Basic Shapes
Let’s begin by drawing two simple circles for the main parts of our dinosaur. Draw a medium-sized circle for the head and a larger, slightly oval shape for the body. Place the head circle slightly above and to the left of the body oval.
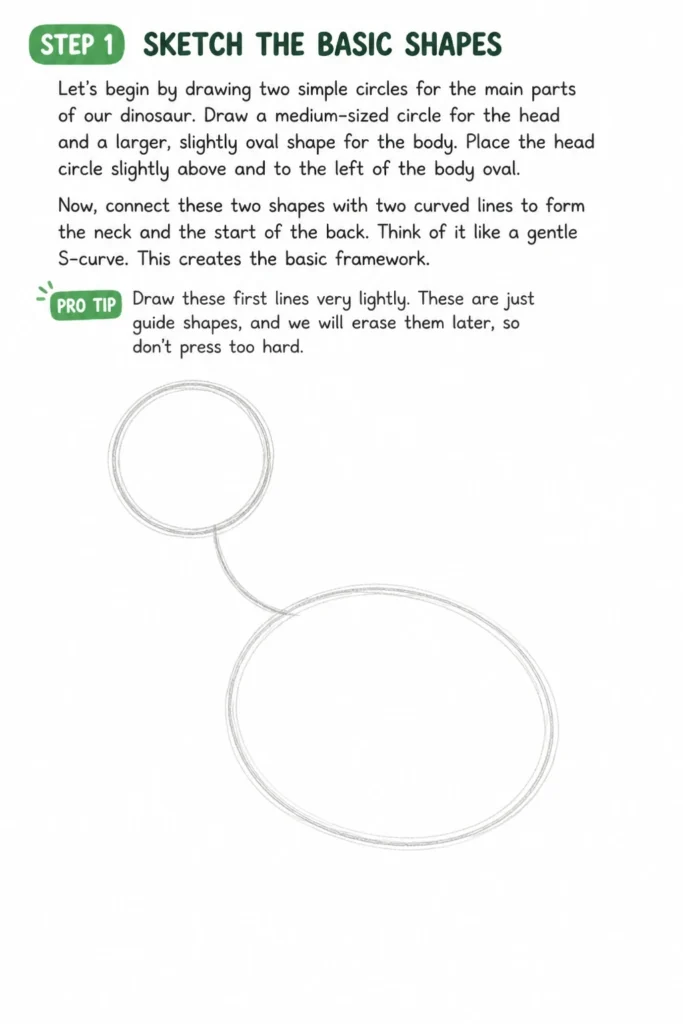
Now, connect these two shapes with two curved lines to form the neck and the start of the back. Think of it like a gentle S-curve. This creates the basic framework.
Pro Tip: Draw these first lines very lightly. These are just guide shapes, and we will erase them later, so don’t press too hard.
Step 2: Define the Head and Jaw
From the head circle, extend a curved line forward to create the snout of your dinosaur. This line should gently curve downwards towards the front.
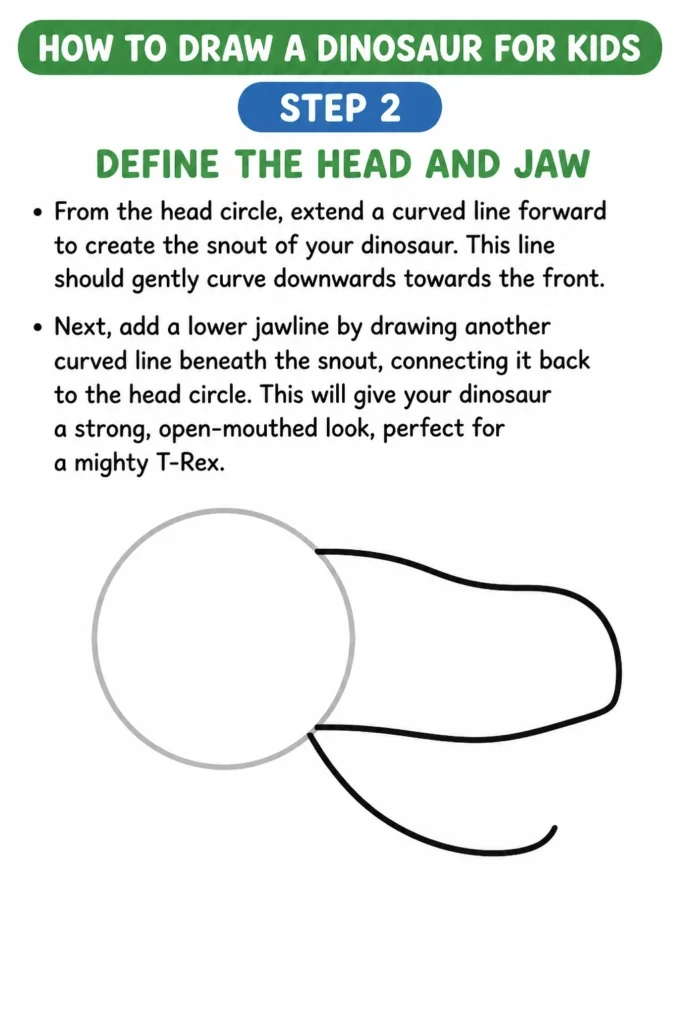
Next, add a lower jawline by drawing another curved line beneath the snout, connecting it back to the head circle. This will give your dinosaur a strong, open-mouthed look, perfect for a mighty T-Rex.
Step 3: Shape the Body and Belly
Now, focus on the body oval. Gently curve the top line of the body to connect smoothly from the neck to where the tail will begin. This gives our dinosaur a powerful, muscular back.

For the belly, draw a long, curving line from the bottom of the neck, under the body oval, and continuing towards the back. This line should be a bit flatter than the back curve.
Step 4: Draw the Mighty Legs
Let’s create the powerful legs. For the first leg, draw two slightly curved lines extending downwards from the belly line. These lines should widen a bit at the bottom.
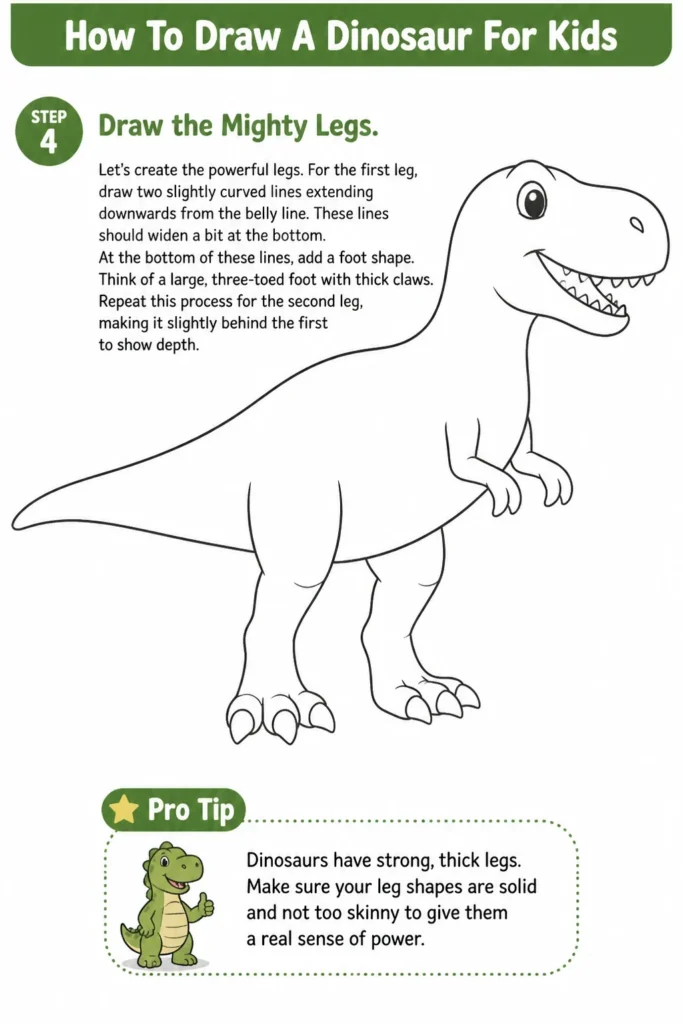
At the bottom of these lines, add a foot shape. Think of a large, three-toed foot with thick claws. Repeat this process for the second leg, making it slightly behind the first to show depth.
Pro Tip: Dinosaurs have strong, thick legs. Make sure your leg shapes are solid and not too skinny to give them a real sense of power.
Step 5: Sketch the Tiny Arms
Our dinosaur needs its unique arms. Draw two small, curved lines extending from the chest area, just behind the neck. These should be quite short compared to the legs.

At the end of these arm lines, add two small, clawed fingers. Remember, these arms are often depicted as very small but still strong.
Step 6: Outline the Powerful Tail
Now, extend the back line and the belly line to form a long, tapering tail. The tail should be thick at the base and gradually get thinner towards the tip.
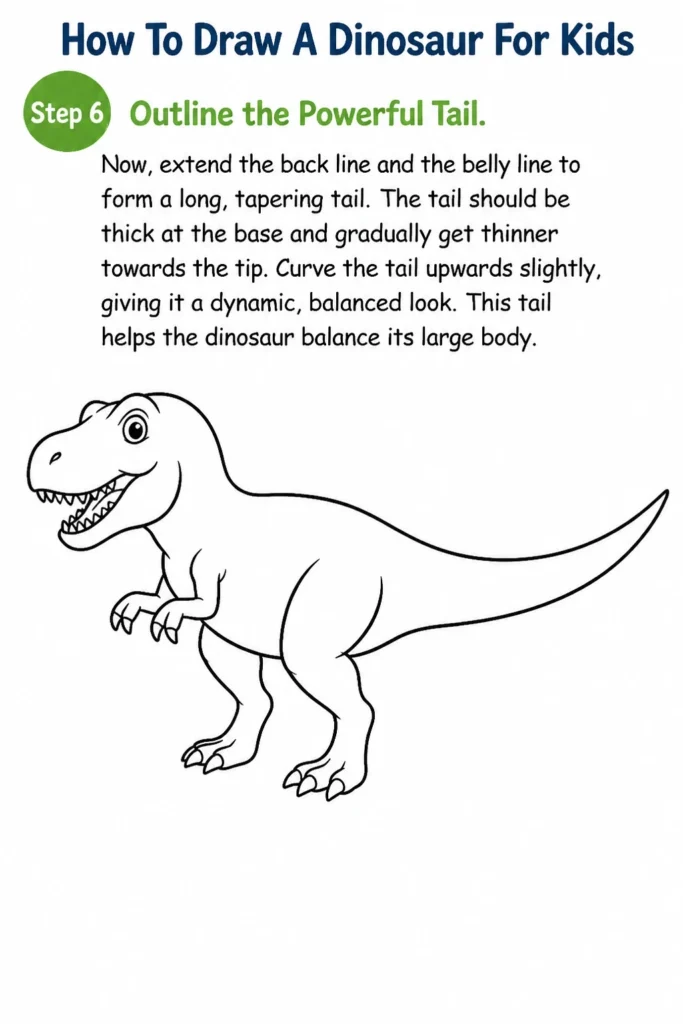
Curve the tail upwards slightly, giving it a dynamic, balanced look. This tail helps the dinosaur balance its large body.
Step 7: Add Facial Features and Details
It’s time to bring our dinosaur to life! Draw a small circle for the eye within the head shape. You can add a pupil inside for a more focused gaze.

Next, add a nostril near the front of the snout. For the teeth, draw a series of small, pointed triangles along the jawline. These don’t have to be perfect, just give the impression of many sharp teeth.
Step 8: Erase Guidelines and Finalize
Carefully erase all the initial guide circles and lines you drew in Step 1. Your dinosaur outline should now stand out clearly.
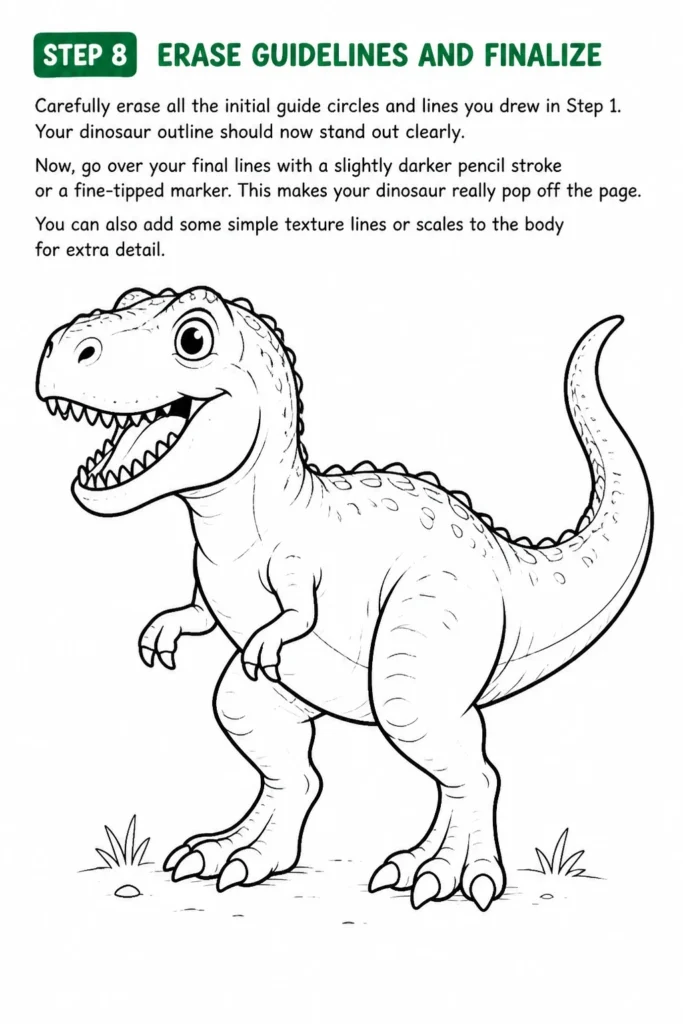
Now, go over your final lines with a slightly darker pencil stroke or a fine-tipped marker. This makes your dinosaur really pop off the page. You can also add some simple texture lines or scales to the body for extra detail.
Step 9: Bring it to Life with Color
This is the most fun part! Choose your favorite colors to bring your dinosaur to life. You might use shades of green, brown, or even vibrant blues and purples.

Color your dinosaur carefully, staying within the lines. You can add shadows or highlights to make it look even more three-dimensional.
Common Mistakes to Avoid
Making Limbs Too Skinny
A common mistake is drawing dinosaur legs and arms that are too thin. Dinosaurs were massive creatures and needed very strong, thick limbs to support their weight. If the limbs are too skinny, the dinosaur looks unstable and unrealistic. Always aim for robust, muscular-looking legs and a sturdy neck to match their powerful bodies.
Ignoring Basic Shapes
Sometimes artists jump straight into drawing details without starting with simple shapes. This often leads to disproportionate or awkwardly structured dinosaurs. Always begin with basic circles and ovals to establish the correct proportions and placement of the head, body, and tail before adding any finer details. These guides are your foundation.
Drawing Flat Poses
Many new artists draw dinosaurs standing perfectly still and flat, lacking any sense of movement. Try to give your dinosaur a dynamic pose, even a slight curve in the tail or a bend in a leg suggests action. Think about how a real animal might move or stand, and try to capture that energy in your drawing.
Over-Complicating Details
When drawing for kids, it’s easy to get carried away with too many scales, wrinkles, or intricate muscle definitions. While details are important, too many can make the drawing look cluttered and overwhelming. Keep the details simple and clear, focusing on the most recognizable features like eyes, teeth, and claws, without bogging down the overall image.
Troubleshooting
My Dinosaur Looks Stiff
If your dinosaur appears rigid or lifeless, it’s likely due to straight lines and symmetrical poses. To fix this, try introducing more curves into the neck, back, and tail. Imagine a gentle “S” shape running through its body. Also, try to position the legs slightly differently, as if one is taking a step, to create a sense of potential movement.
The Head and Body Don’t Connect Right
Sometimes the head and body can look disjointed, like two separate pieces. This usually happens if the neck lines are too abrupt or angular. To smooth this out, gently redraw the neck lines, making them soft and continuous curves that seamlessly blend into both the head and the main body shape. Think of the neck as a natural extension, not an attachment.
My Dinosaur’s Proportions Seem Off
If your dinosaur looks unbalanced, perhaps with a head too big or a tail too short, go back to your initial guide shapes. Were your starting circles and ovals in good proportion to each other? Adjust these basic shapes first. Make the head circle smaller relative to the body oval, or extend the tail guide line longer, then redraw your details over the corrected guides.
Key Takeaways
- Always start with light, simple shapes like circles and ovals to build your dinosaur’s foundation.
- Use curved lines to give your dinosaur a natural, dynamic, and less stiff appearance.
- Pay attention to the thickness of limbs; dinosaurs were powerful, so their legs and neck should reflect that.
- Don’t be afraid to erase and redraw; it’s a key part of the artistic process.
- Adding simple, recognizable details like eyes, teeth, and claws brings your dinosaur to life.
- Coloring is where your dinosaur truly becomes unique and expresses your creativity.
Frequently Asked Questions
What if my drawing doesn’t look perfect?
That’s perfectly normal and part of the fun of drawing! Art is about expression, not perfection. Every artist, no matter their age, makes drawings that aren’t “perfect.” Just keep practicing, and you’ll see amazing improvements over time. The most important thing is to enjoy the process.
Can I draw a different type of dinosaur using these steps?
Absolutely! While this guide focused on a T-Rex, the core principles of starting with basic shapes, building up the body, and adding details apply to all dinosaurs. You might adjust the head shape for a Triceratops, add a long neck for a Brontosaurus, or draw wings for a Pterodactyl. Use these steps as a foundation and let your imagination guide you.
How can I make my dinosaur look more realistic?
To add realism, observe real animals and how their muscles and skin look. You can add subtle lines for muscle definition, light cross-hatching for texture, or vary the pressure of your pencil to create shadows. Looking at pictures of dinosaur skeletons or paleontological reconstructions can also give you ideas for realistic proportions and features.
Should I use a pen or pencil for the final outline?
For the final outline, a pen can give a clean, bold look that makes your dinosaur stand out. However, a dark pencil line is also perfectly fine and allows for more shading options. If you’re nervous about making permanent marks, stick with a dark pencil first, as it allows for minor corrections before coloring.
Our Top Recommended Finds
- Good Quality Sketch Pad: A sturdy pad with smooth paper makes drawing much more enjoyable and prevents bleed-through when coloring.
- Beginner Pencil Set: A set with different lead hardness (like 2B, HB, 2H) offers versatility for sketching light guides and drawing darker final lines.
- Eraser Kit: A kneaded eraser is excellent for lifting pencil marks without smudging, and a precise stick eraser helps with small details.
Your Prehistoric Masterpiece Awaits!
You’ve just created an amazing dinosaur, line by line, detail by detail. What an incredible journey!
Drawing is a skill that grows with every attempt. Don’t stop here; your artistic adventure is just beginning.
Why not try drawing another dinosaur, perhaps a different kind, or even create a whole prehistoric scene? Grab your pencil and paper today, and let your imagination roam free in the land of giants!